When deadlines come, it would be inefficient to tag each view on each of your 100 sheets one by one. Easy solution: let Tagitize do all views in one go!
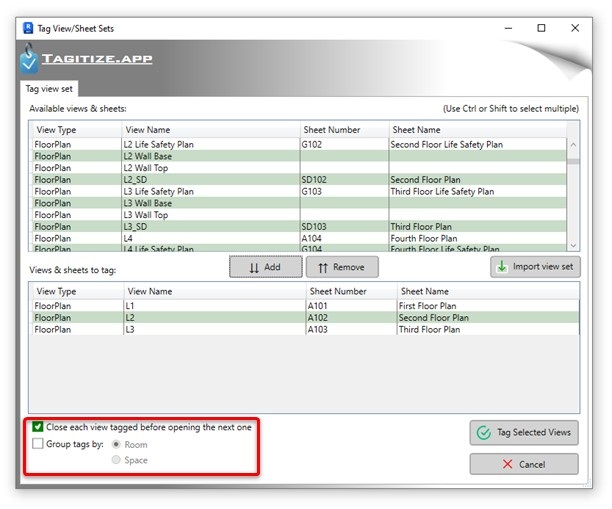
To start, click Tag View/Sheet Set to open the view selection window. Select views and sheets you want to tag in the top table and click Add to insert those into the bottom list.

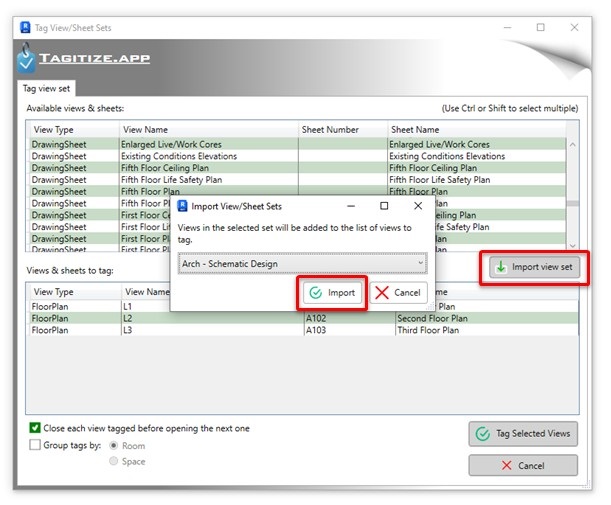
If you have already created some view/sheet sets in the model, even better! Simply click Import View Set, select a set from the menu, and click Import. This will add all views from the set to the bottom table.
Next, decide if you want Tagitize to “Close each view tagged before opening the next one”. This is because the app will need to open each selected view before tagging. If you have lots of views selected, we recommend enabling this option to prevent Revit from running out of memory due to having too many views opened. If you’re only tagging a few views at a time, however, it can be more convenient to keep activated views open so you won’t have to open each one after the tagging process to check the result.
Finally, you can set Tagitize to group tag hosts by rooms or spaces. If the Group Tags By box is unticked, the app will only group tag hosts by the grouping distance defined under Tag Settings.