
Before generating any tags, we need to tell Tagitize which Revit objects it should annotate and how new tags should look like. To configure this, open the Tagitize tab and click Tag Settings.

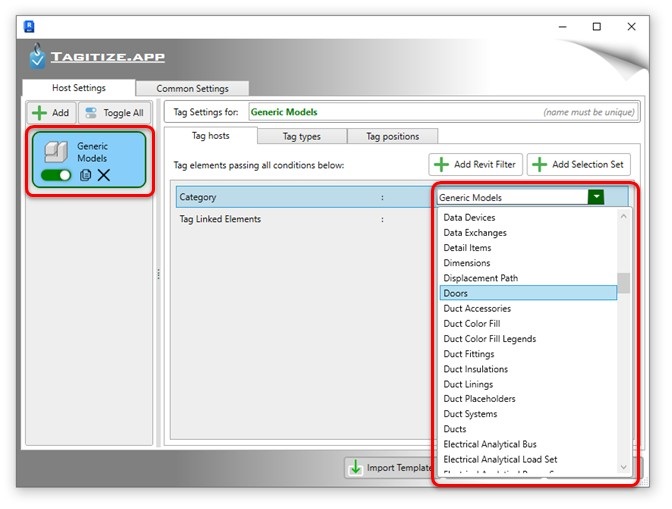
Under the Host Settings tab, you can select different Revit categories to tag. The first time you open Tag Settings, there will be a placeholder card already on the list. Select this card and change the Category value as required:
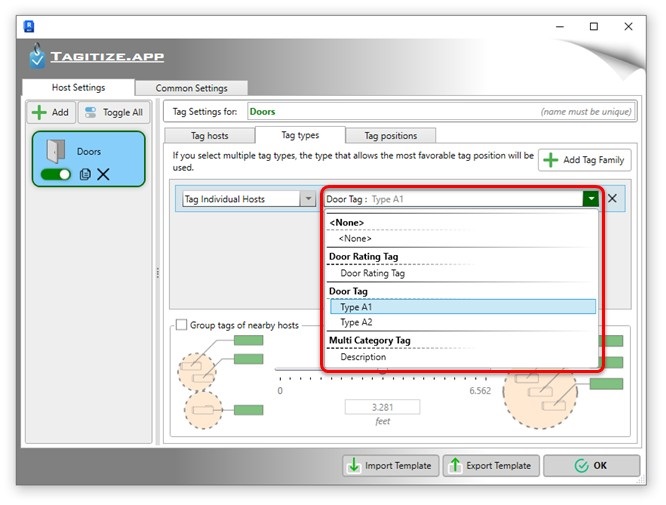
Next, we need to tell Tagitize which tag family to use. Under the Tag Types tab, there‘s a dropdown menu already added. Specify your preferred tag type here for the category you selected earlier.
To finish your first basic settings, switch to the Tag Positions tag. Here, you can select at which position type the app can try to place new tags. For example, directly on top of the host element or off to the side with a leader line. If you select multiple position types, the app will later analyze each tag and pick the most favorable position type for it.

Another thing you can define here is the angle of tag leader lines if you want to use those. Just drag the slider to specify the angle in increments of 5 degrees. If you put it at 0 degree, the leaders will be straight lines with no elbow points.
Finally, unticking the Use Tag Leaders box will tell the app to place tags close to the host elements and disable all leader lines.
You can now click OK to save your settings and follow the next section to put it into action!