
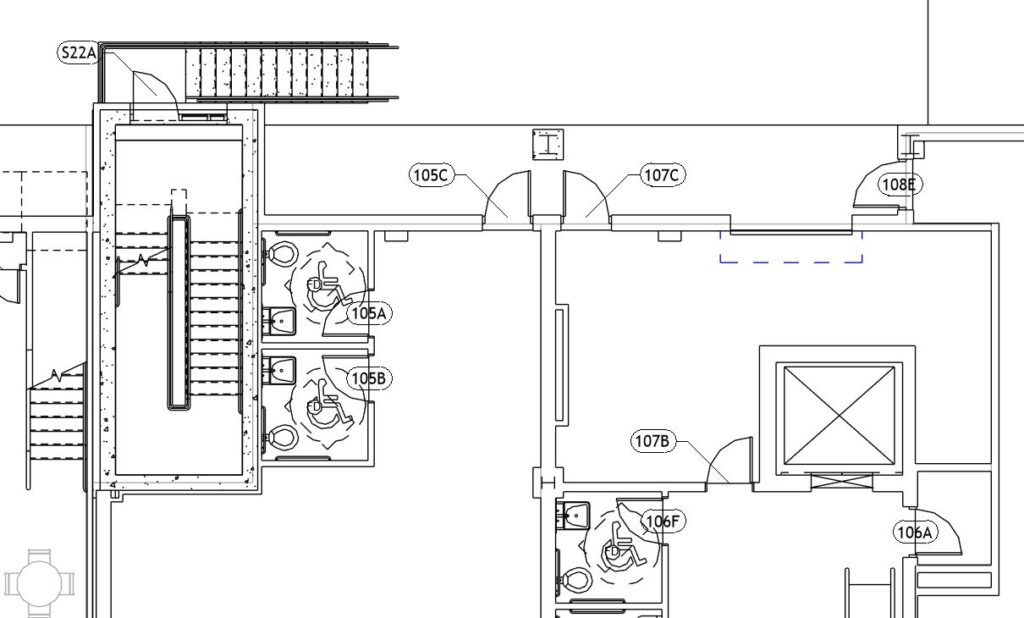
With the basic settings in place, it’s time to open a view you want to tag. Next, return to the Tagitize tab and click Tag Current View. Let the app run for a few seconds, and you will get something like this:
A new window will also appear to report all tags generated for the view. Apart from basic information like tag family and type names, it uses colors to show if a tag has collisions with other tags or existing elements in the view. Green here means there are no collisions and red means the highest number of collisions in the entire report.
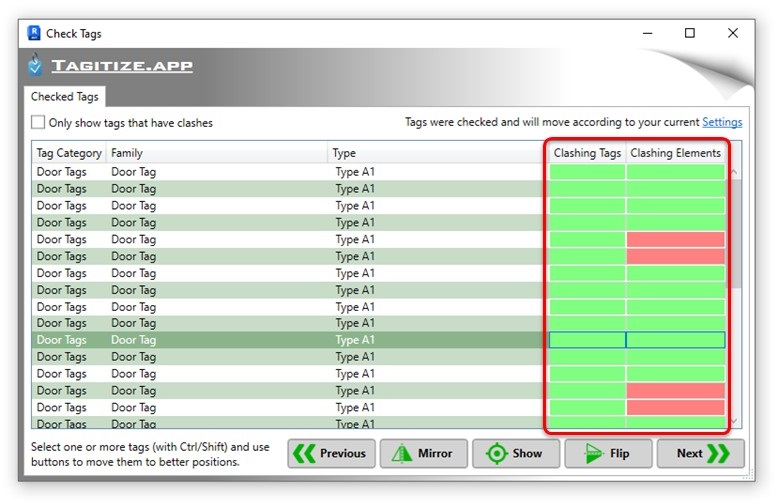
Along the bottom of the report are commands to help you further finetune the tags.These include:
Show: Select and zoom the view to see the selected tag. You can also just double click the tag in the report to zoom right to it, so this button is more useful when you need to show multiple tags at once.
Mirror: mirror the tag horizontally
Flip: flip the tag vertically
Next: move the tag to the next best position computed by Tagitize. Keep clicking it until a good position is shown.
Previous: the opposite of Next, this command moves the tag back to a previous position that you came across while clicking Next.
All these commands work on one or multiple tags in the report. Simply select one or more rows and try these out!
Alternatively, you can select tags from the view and their respective rows in the report will be automatically selected/highlighted.
Congratulations! You have successfully tagged a view using Tagitize! See the next sections on how to improve the result. Hint: Building the right Settings is essential.