Tagitize tries its best to place new tags away from other existing tags and clear off underlay element categories of your choice. If you’re in an Architecture model, for example, any elements from the Structure and MEP links can be considered underlay elements. It’s generally a good idea not to place tags that overlap these underlay objects if there’s a clear space big enough to fit those tags, and this is what the app tries to do.
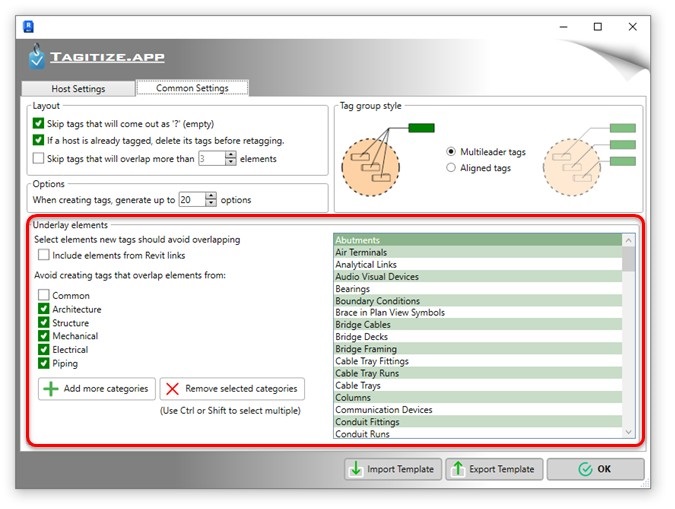
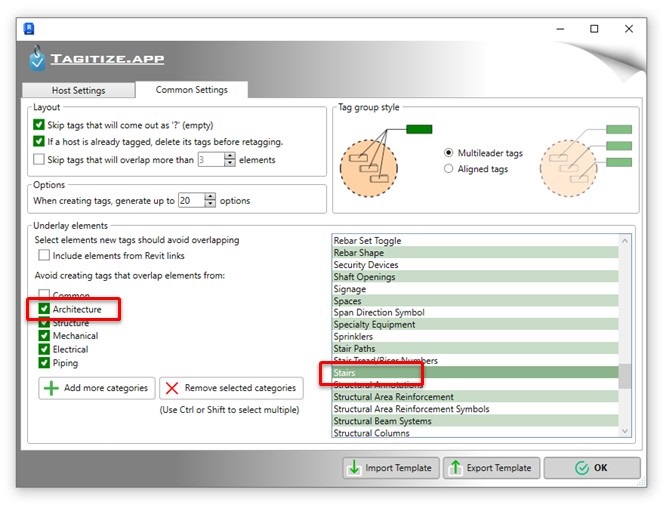
You have full control over which Revit category the app should consider “underlay”. Under the Common Settings tab, Tagtitize has grouped these categories by discipline for you:
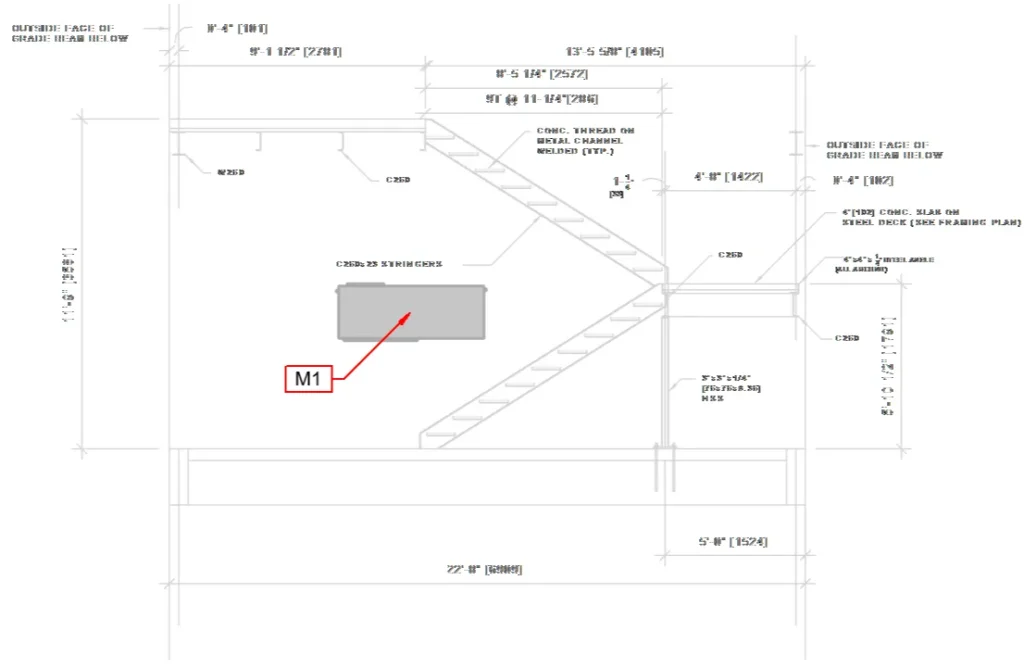
Imagine you tagged some doors and found out several tags overlap stairs in the background, like this one:
Don’t fancy fixing this manually? Simply undo the tag command (Ctrl + Z) and open Tag Settings. In the Underlay Elements section, tick the box for Architecture categories. This will add, among others, the Stair category to the list on the right.
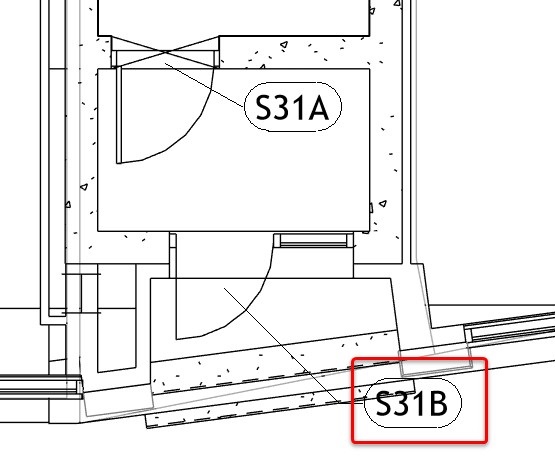
Run the tagging command again, and the app should resolve overlaps better this time:
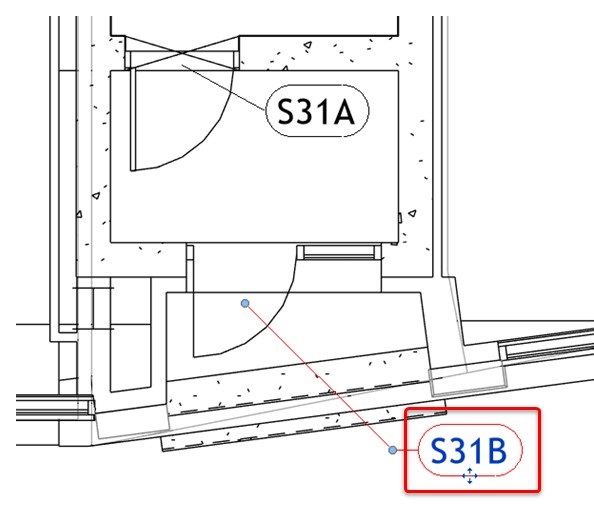
Did you notice that the other tag at the top of the image stayed clear off the walls? That’s no coincidence. The Walls category has been set as an underlay category all this time!
Note that not all categories are covered by the preset disciplines. If you want to add more uncommonly needed categories, click Add More Categories, make your selection, and then click Add Categories to pop them into the list.

If you want to remove some underlay categories instead, select those in the list and click Remove Selected Categories. This will tell Tagitize that new tags don’t need to avoid overlapping these underlay elements. You can also remove a category by clicking the small X button on its row.

Generally, we recommend selecting only the categories that new tags should avoid overlapping. Including too many underlay categories can slow down the tagging process, especially if you also tick the Include elements from Revit links box.
Keeping CAD background clear #
Have some linked or imported DWG files in your view? You probably want generated tags not to clash with the CAD background. Check out this article on how to do that.